Ionic/Angular - Recursively Rendering A Tree Structure
17 May 2018What Will I Learn?
In this tutorial you will learn two ways of recursively rendering a tree structure in Angular. For the ease of use, I will be using Ionic framework but concepts still apply since it is still Angular. Ionic is just a UI framework on top of Angular. In brief, you will learn the following:
- Recursively rendering of a tree structure using custom components
- Recursively rendering of a tree structure using pure Angular templates
Requirements
In order to follow this tutorial, you should meet the following requirements:
- Knowledge of the Angular framework
- Knowledge of recursion
- Knowledge of custom components in Angular
- A working Angular or Ionic project running (will not cover how to start these nor will cover how to use the CLI to create components)
Difficulty
- Advanced
Tutorial Contents
This tutorial will be split in two sections. First section will be about rendering a tree structure using a custom component and the second section will be about rendering a tree structure using pure Angular templates.
For both examples, we will be using the following tree structure:
[
    {
      name: 'Laptop',
      children: [
        {
          name: 'Apple',
          children: [{name: 'Macbook Air'}, {name: 'Macbook Pro'}]
        },
        {
          name: 'Microsoft',
          children: [{name: 'Surface Pro'}]
        }
      ]
    },
    {
      name: 'Desktop',
      children: [{name: 'Dell'}]
    }
]
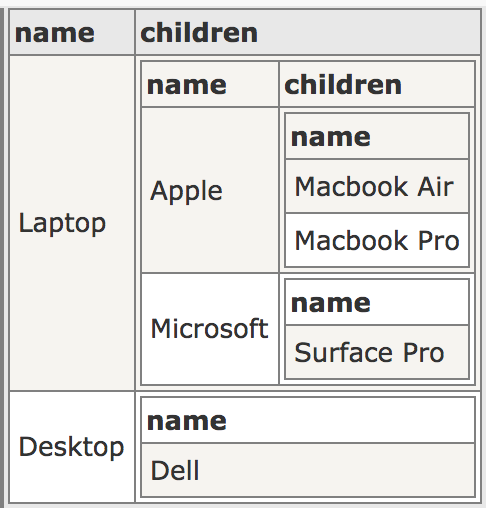
The JSON above should be rendered as following:
- Laptop
- Apple
- Mackbook Air
- Mackbook Pro
- Microsoft
- Surface Pro
- Apple
- Desktop
- Dell
This JSON will be represented as two trees. First tree will have “Laptop” as root with two parents called “Apple” and “Microsoft”. “Apple” parent will have 2 two child called “Macbook Air” and “Macbook Pro” while “Microsoft” parent will only have one child called “Surface Pro”. The other tree will have “Desktop” as root with a leaf called “Dell”.
Since the depth of the tree is not known, this problem can be solved recursively.
Rendering tree structure using custom component
The first step to be done here is to create a new component. I will call mine “tree-view” but feel free to name yours as you please. After you have created your custom component, you will have a very similar code as the following:
import { Component } from '@angular/core';

/**
 * Generated class for the TreeViewComponent component.
 *
 * See https://angular.io/api/core/Component for more info on Angular
 * Components.
 */
@Component({
  selector: 'tree-view',
  templateUrl: 'tree-view.html'
})
export class TreeViewComponent {

  text: string;

  constructor() {
    console.log('Hello TreeViewComponent Component');
    this.text = 'Hello World';
  }

}
Since our template will not be large, we will remove the templateUrl and it will be replaced by an inline template. In addition, everything inside the constructor will be removed and the “text” variable will be deleted as well. After the clean up, your code should look like this:
import { Component } from '@angular/core';

/**
 * Generated class for the TreeViewComponent component.
 *
 * See https://angular.io/api/core/Component for more info on Angular
 * Components.
 */
@Component({
  selector: 'tree-view',
})
export class TreeViewComponent {

  constructor() {
  }

}
Then, we will import Input module into our component:
import { Component, Input } from '@angular/core';
And will declare two variables as inputs. One of them will hold the array of data and the another one will hold the key of the nested children.
@Input('data') items: Array<Object>;
@Input('key') key: string;
And finally, we will declare our template below the selector in the component decorator:
template: `
    <ul *ngIf="items.length">
      <li *ngFor="let item of items">

      <ui-tree *ngIf="item[key]?.length" [key]="key" [data]="item[key]"></ui-tree>
      </li>
    </ul>
`
Let’s breakdown the piece of code above. First, everything will be wrapped into an ul tag. This ul tag will be displayed if and only if the length of the items is larger than 0. Then, there is a nested li element creating a for loop iterating over the array given by the input. Inside this li element, the attribute name of the current element in the array will be displayed and there will be a recursive call if the item at “key” attribute length is larger then 0. If so, the new data will be the item will be the current item array.
If we translate this into a programming language, we will get the following code (I will do it in Python):
def ui-tree(items, key):
      if len(items) > 0:
            for item in items:
                  print(item["name"])
                  if len(item[key]) > 0:
                         return ui-tree(item[key], key)
The whole code will look as this:
import { Component, Input } from '@angular/core';

/**
 * Generated class for the TreeViewComponent component.
 *
 * See https://angular.io/api/core/Component for more info on Angular
 * Components.
 */
@Component({
  selector: 'tree-view',
  template: `
    <ul *ngIf="items.length">
      <li *ngFor="let item of items">

      <tree-view *ngIf="item[key]?.length" [key]="key" [data]="item[key]"></tree-view>
      </li>
    </ul>
  `
})
export class TreeViewComponent {
  @Input('data') items: Array<Object>;
  @Input('key') key: string;

  constructor() {}

}
After that, you can test your custom component in your default Angular page. In my case, since I am using Ionic for the UI, predefined pages are already created but feel free to use the same exact code at app.component.html file (if you are using Ionic like me, make sure to import your components module into the page you are using in case of LazyLoading):
<tree-view [data]="data" [key]="key"></tree-view>
And inside your .ts file, declare the following two variables:
key: string = "children";
data: Array<Object> = [
    {
      name: 'Laptop',
      children: [
        {
          name: 'Apple',
          children: [{name: 'Macbook Air'}, {name: 'Macbook Pro'}]
        },
        {
          name: 'Microsoft',
          children: [{name: 'Surface Pro'}]
        }
      ]
    },
    {
      name: 'Desktop',
      children: [{name: 'Dell'}]
    }
]
If you run the project, you can expect the following tree draw:
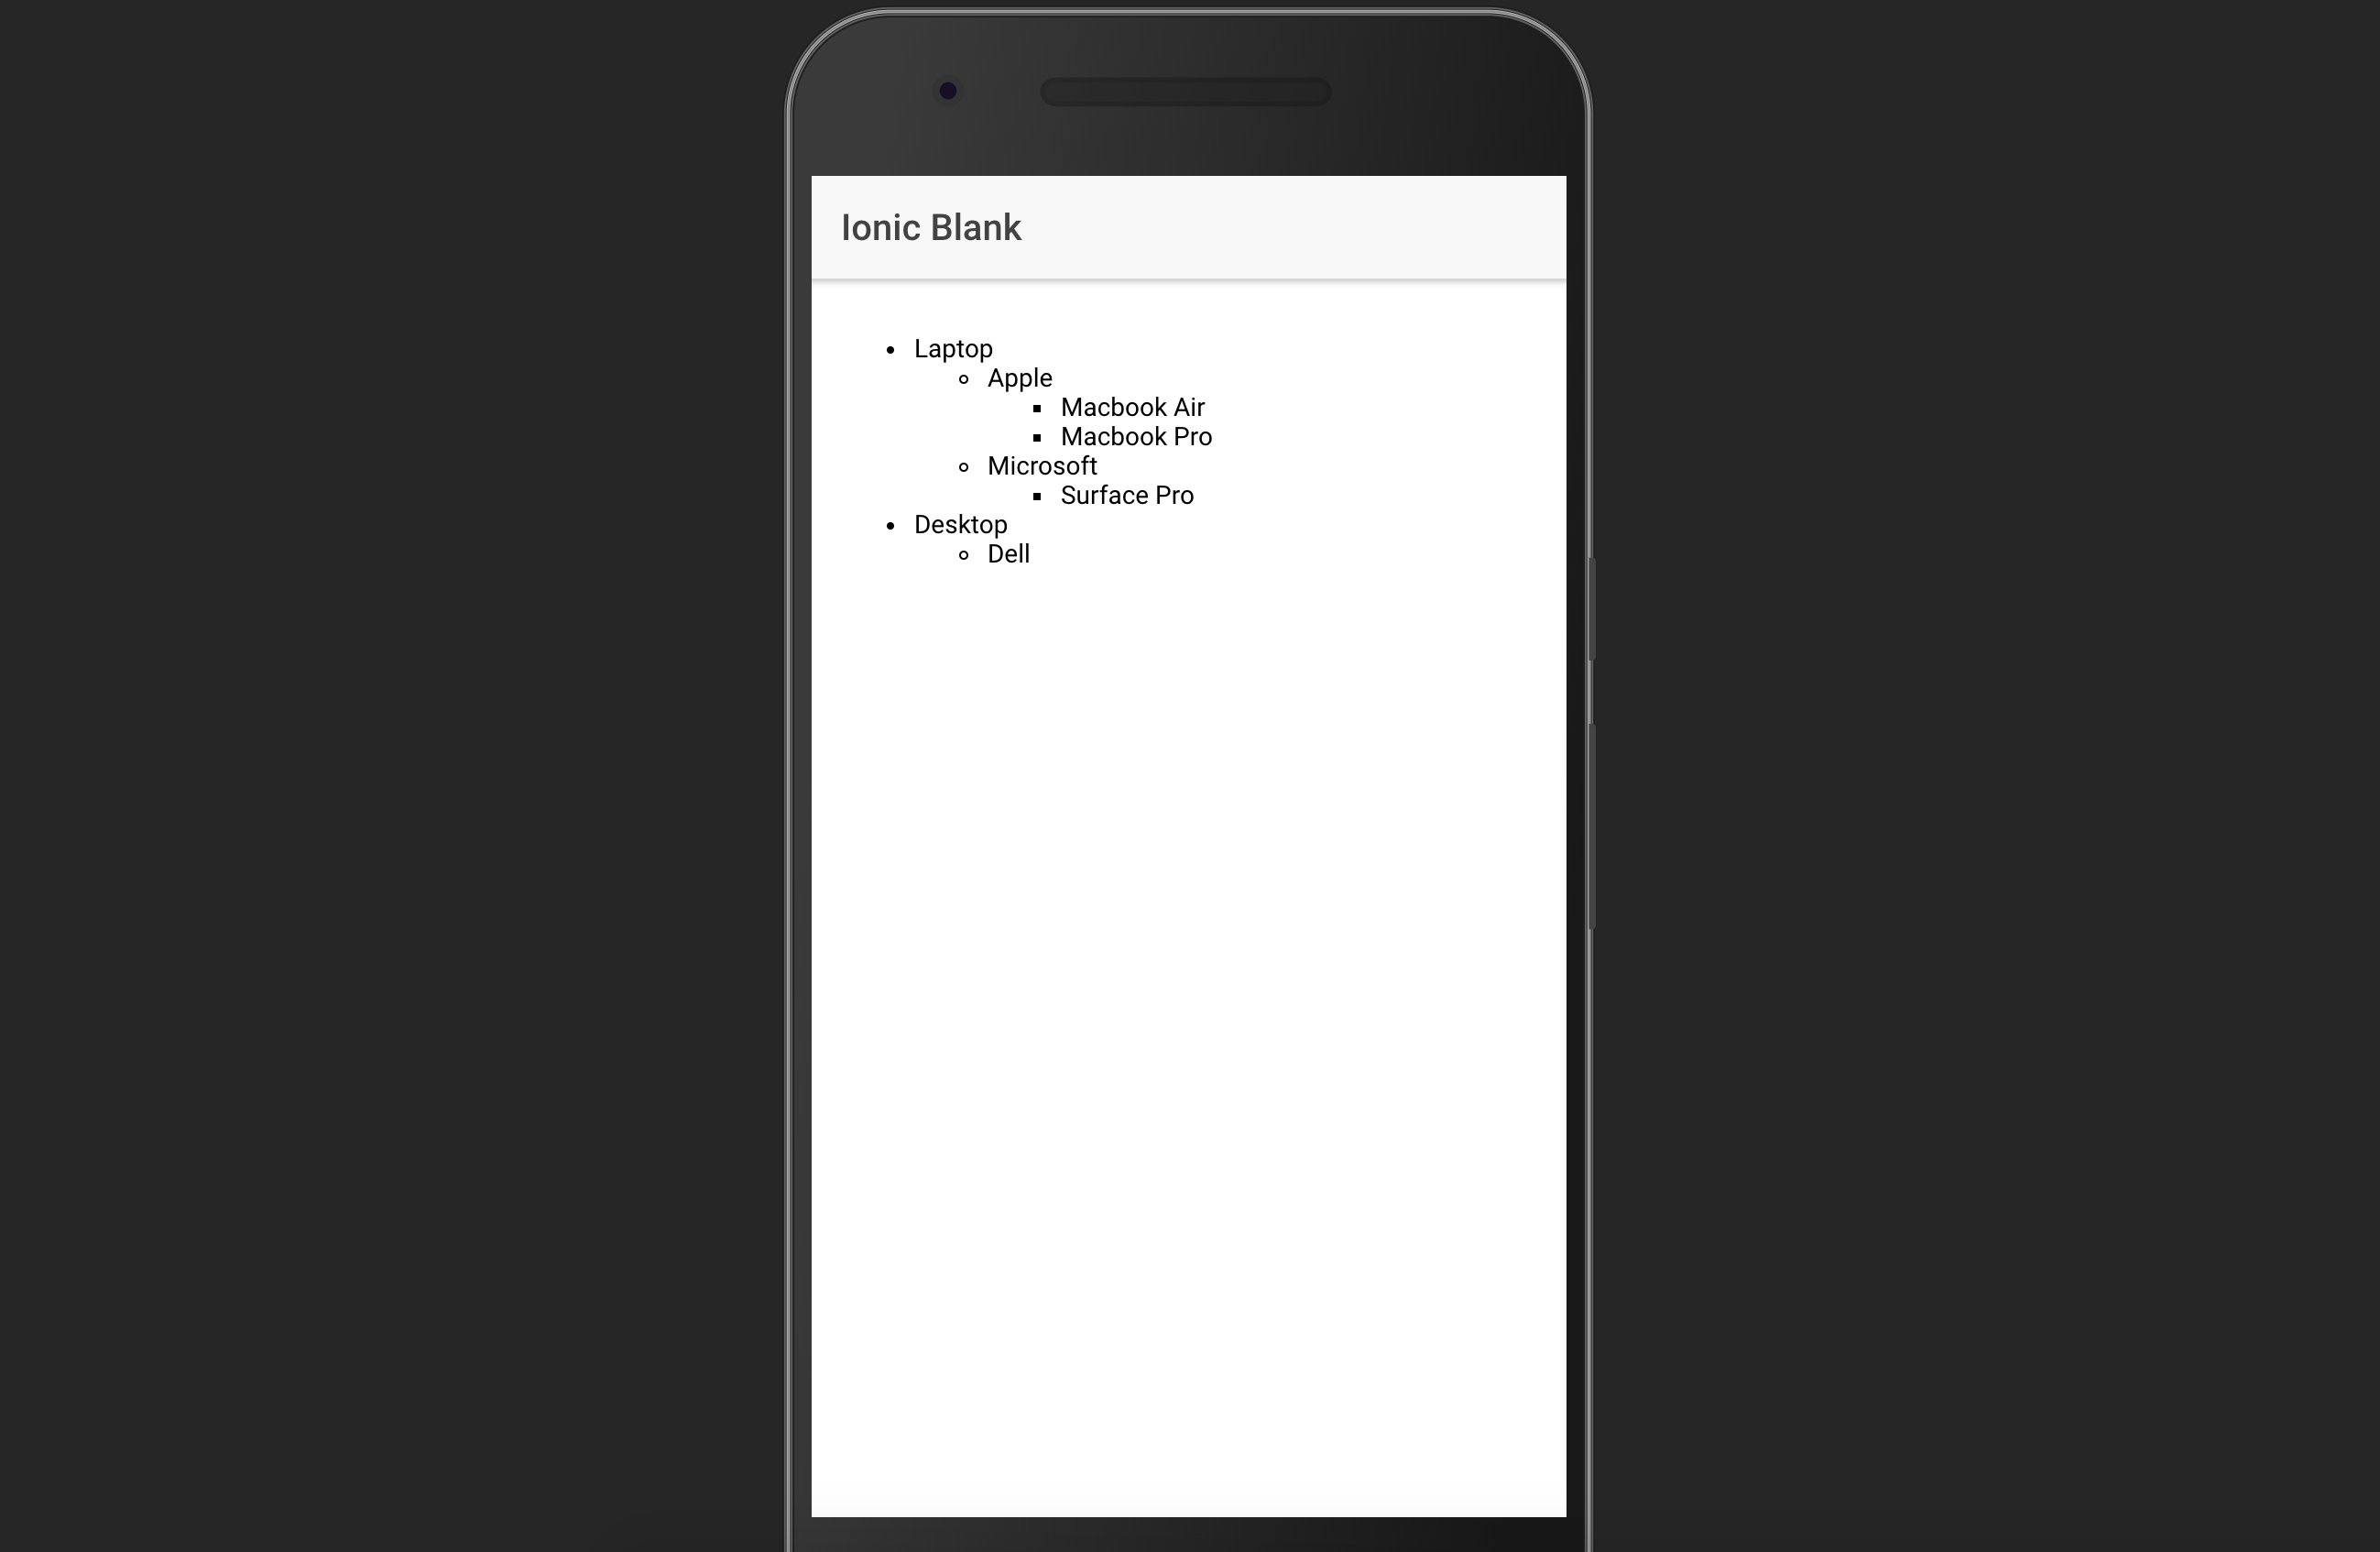
And this is all. You can now reuse this component to render nested JSON responses.
Rendering tree structure using pure Angular templates
This one will achieve the same thing but in a different way. This one will be worked directly in app.component.html (and in my case, home.html). First, we will create an ul tag and inside this ul tag we will nest a ng-template tag:
<ul>
      <ng-template>
      </ng-template>
</ul>
To the ng-template, we will assign a variable and declare the array of elements using the let- directive of Angular.
<ul>
      <ng-template #treeView let-data>
      </ng-template>
</ul>
In this case, we will use treeView as the reference variable and let-data since data contains our array of objects. The next step is to create a for loop in a li element iterating over the array of objects (data):
<ul>
      <ng-template #treeView let-data>
            <li *ngFor="let item of data">
            </li>
      </ng-template>
</ul>
Inside the li element, we will render the name attribute of the item generated by the for loop. Also, we will generate another ul element if and only if the length of the item’s children is greater than 0:
<ul>
      <ng-template #treeView let-data>
            <li *ngFor="let item of data">

                  <ul *ngIf="item.children?.length > 0">
                  </ul>
            </li>
      </ng-template>
</ul>
Inside the new created ul element, we will do a recursive call using a ng-container using the ngTemplateOutlet directive with the treeView as identifier and the children of the item as context:
<ul>
      <ng-template #treeView let-data>
            <li *ngFor="let item of data">

                  <ul *ngIf="item.children?.length > 0">
                        <ng-container *ngTemplateOutlet="treeView;  context:{ $implicit: item.children }"></ng-container>
                  </ul>
            </li>
      </ng-template>
</ul>
Note that the data is passed as implicit so we will not be using the original data array but the new array which is the children of the item.
Then as a final step, another recursive call will be done after the ng-template element to render the trees with only a leaf (this recursive call will be the same as the last one except that the context will be the whole array this time:
<ul>
      <ng-template #treeView let-data>
            <li *ngFor="let item of data">

                  <ul *ngIf="item.children?.length > 0">
                        <ng-container *ngTemplateOutlet="treeView;  context:{ $implicit: item.children }"></ng-container>
                  </ul>
            </li>
      </ng-template>
      <ng-container *ngTemplateOutlet="treeView; context:{ $implicit: data }"></ng-container>
</ul>
If everything went correct, we will have the following code in our template:
<tree-view [data]="data" [key]="key"></tree-view>

<hr />

<ul>
    <ng-template #treeView let-data>
      <li *ngFor="let item of data">

        <ul *ngIf="item.children?.length > 0">
          <ng-container *ngTemplateOutlet="treeView;  context:{ $implicit: item.children }"></ng-container>
        </ul>
      </li>
    </ng-template>
    <ng-container *ngTemplateOutlet="treeView; context:{ $implicit: data }"></ng-container>
</ul>
which will render the following:
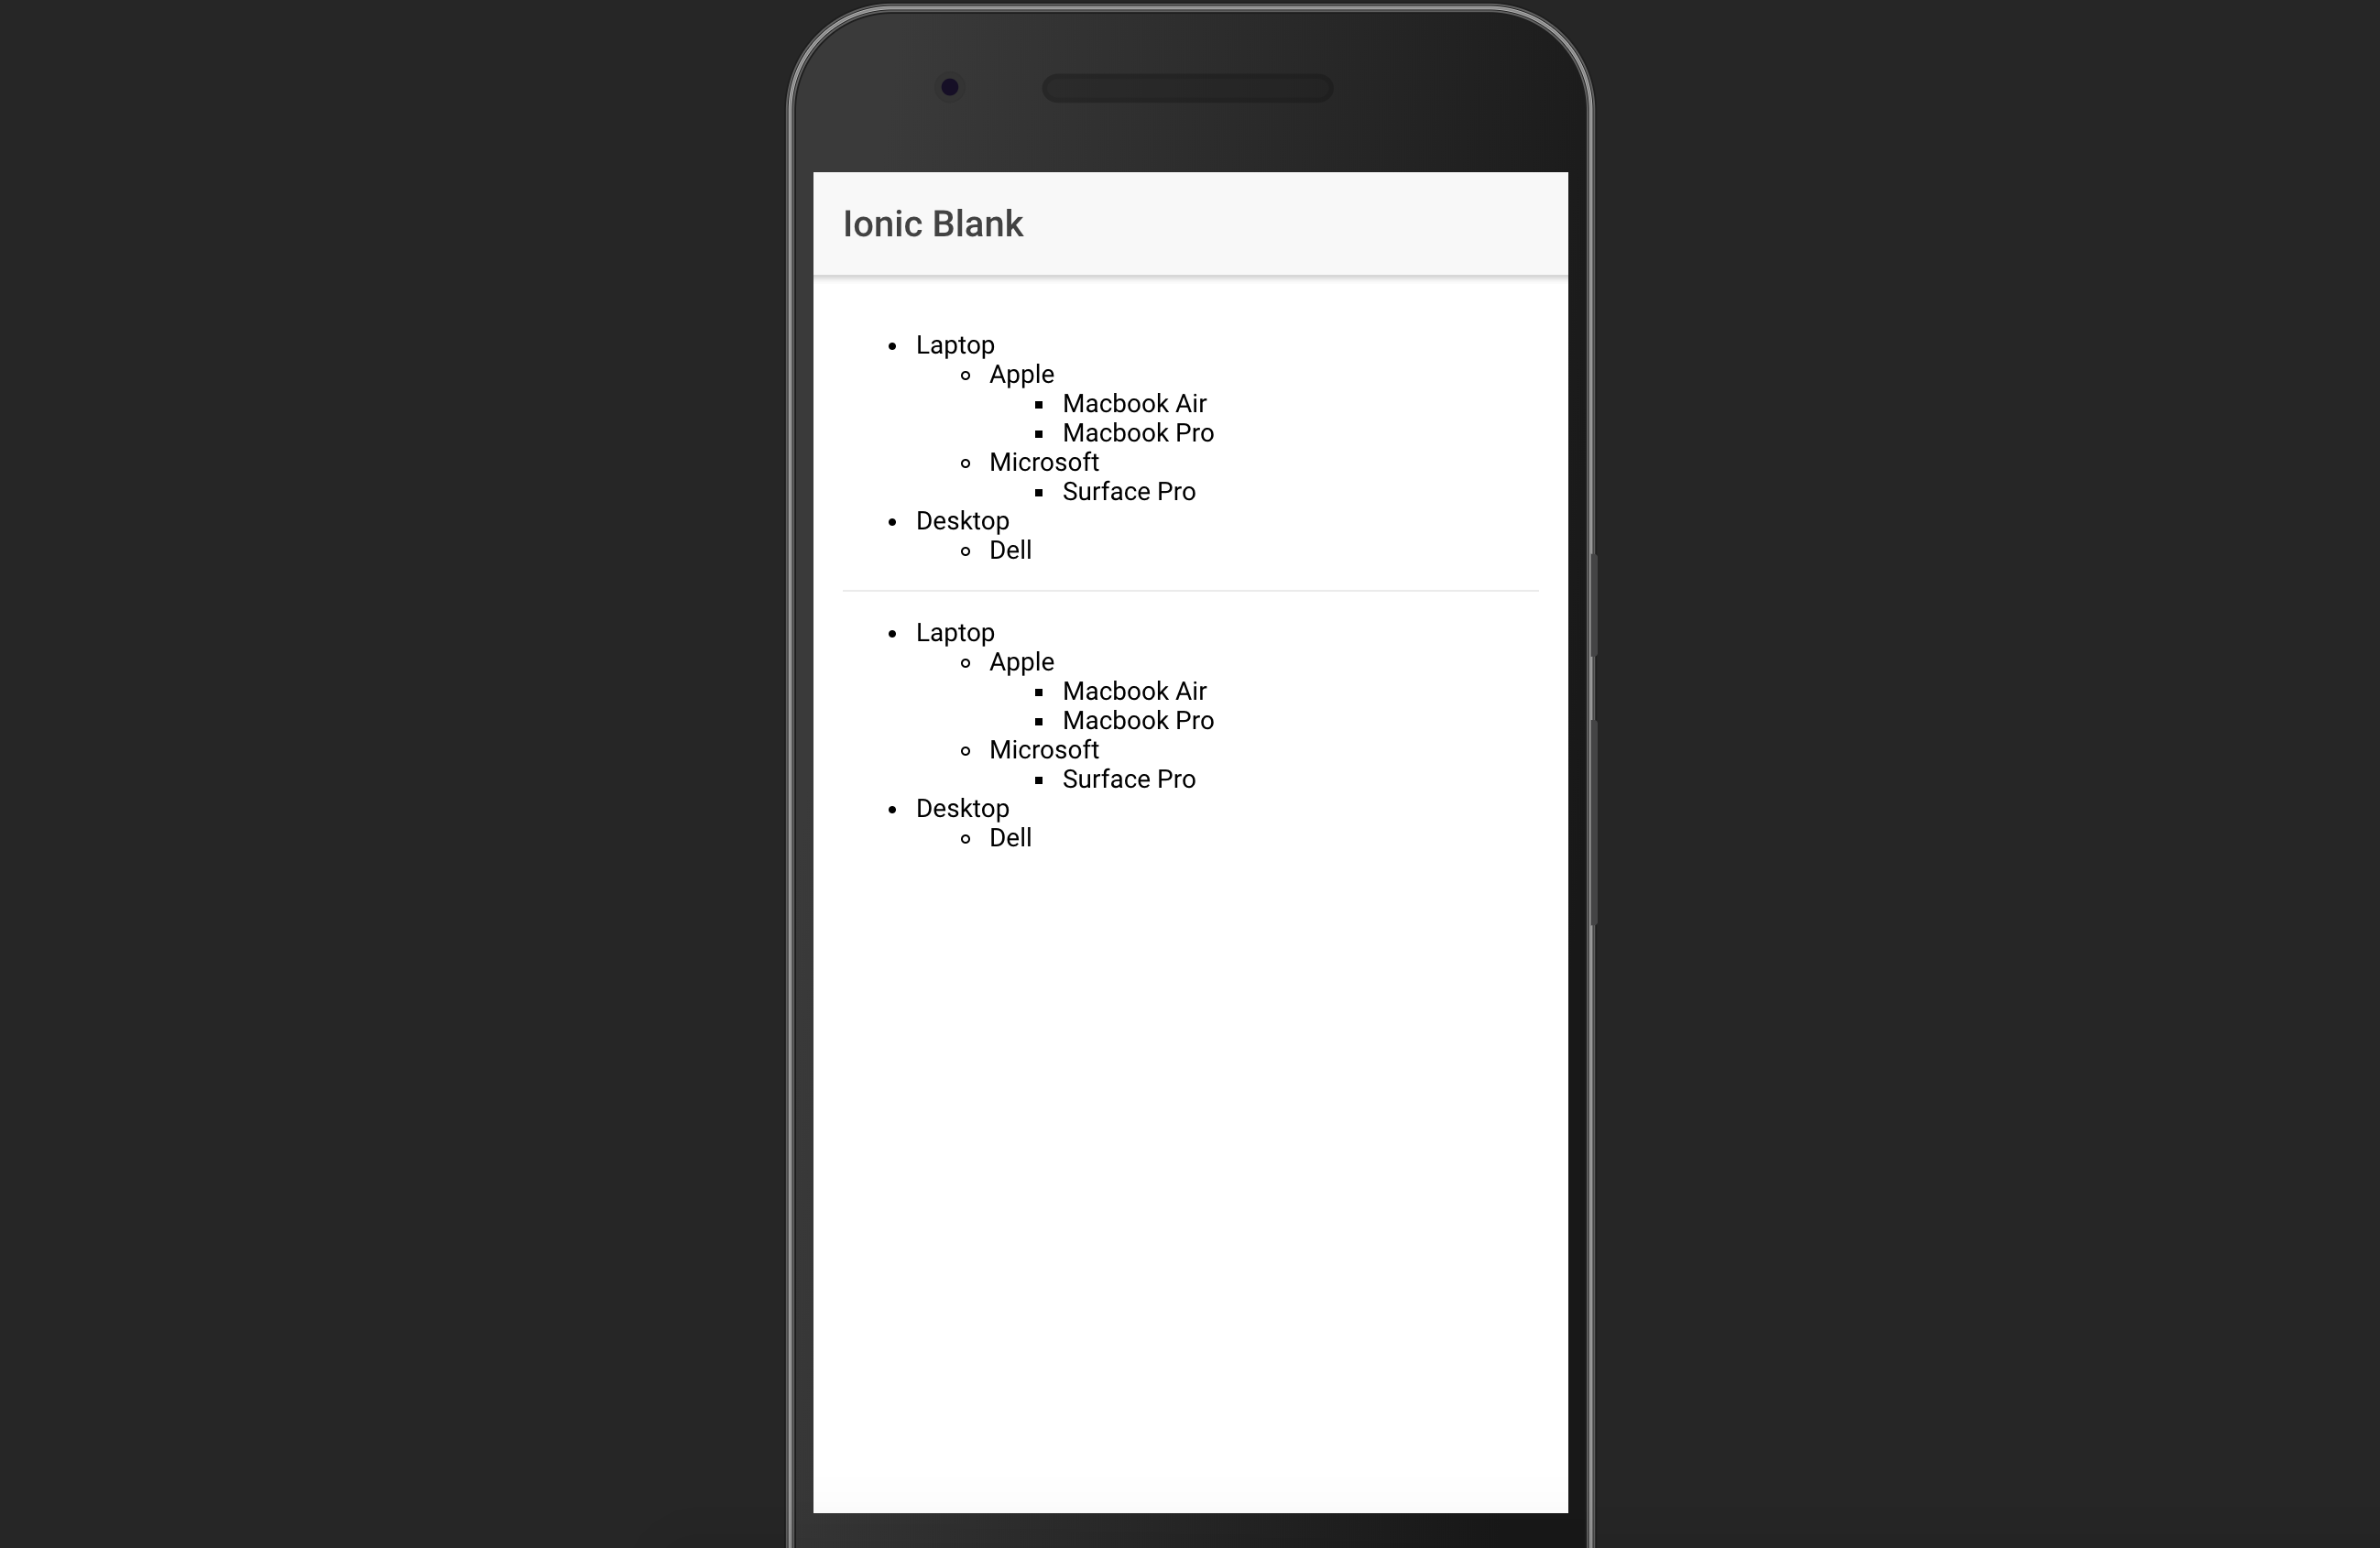
Which one is better?
In my own opinion, first approach better than the second approach because first approach can be reusable and it is easier to read and maintain. Second approach can be reusable if written inside a component but harder to maintain due to its complexity.
However, second approach may be faster since it does not need to create too much nested custom components which can lead to poor performance.
(I haven’t do any benchmark to both of them so those are only assumptions).
If you are lazy to do the work, here is a repo which has it done :D https://github.com/jayserdny/tree-rendering-angular